

Community post
How to authenticate user in rails using devise (#part2)
What Will I Learn?
- You will learn how to send emails in Ruby on Rails Project
- You will learn how to make forgot password using devise
- You will learn how we setup mail clients with SMTP connection
- You will learn the configuration needed for sending the emails in Ruby on Rails Project
Requirements
- OS: Ubuntu/Mac OS
- A text editor like sublime
- Basic understanding about Ruby on Rails
- Email account of Gmail
- And for better understanding must read my part 1 of this tutorial (link added in curriculum)
Difficulty
- Intermediate
Tutorial Contents
Hello and welcome to the 2nd part of the tutorial. In this tutorial, we are going to make configurations in our app to send emails from app and we also make forgot password functionality using devise. So let's start the tutorial.
- First of all run rails server in the project we make in part 1 of this tutorial.
- we know how to generate the devise views as we discussed in the previuos tutorial.
- Devise by defaut gave us the forgot password page but we can overwrite it, for that go to your app in the editor > views > users > password > new
- You will get this form:
<h2>Forgot your password?</h2>

<%= form_for(resource, as: resource_name, url: password_path(resource_name), html: { method: :post }) do |f| %>
  <%= devise_error_messages! %>

  <div class="field">
    <%= f.label :email %><br />
    <%= f.email_field :email, autofocus: true, autocomplete: "email" %>
  </div>

  <div class="actions">
    <%= f.submit "Send me reset password instructions" %>
  </div>
<% end %>
- Now open your localhost:3000/user/password/new in your url to check forgot password is working or not. You will get a error like the below image because by default hostname is set to blank in devise.
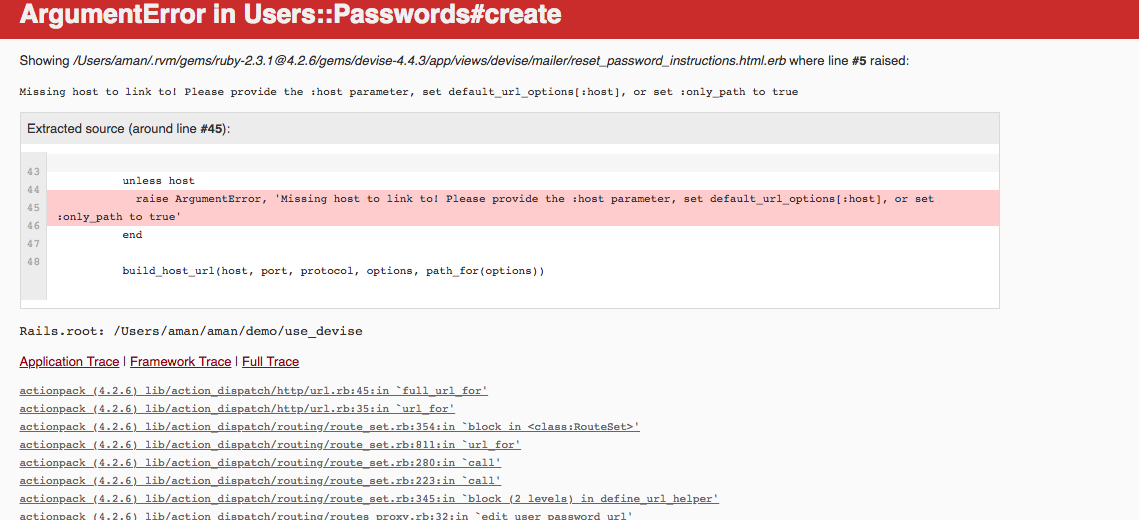
So lets setup our host in rails app to make forgot password functionality working in our app.
Step-1
- Open gmail account
- Click Settings button which is present at the tip right corner
- Click the Forwarding and POP/IMAP tab
- In the "IMAP Access" section, select Enable IMAP
- Click Save Changes

Step-2
- Add a file under mailer and name it application_mailer.rb
class ApplicationMailer < ActionMailer::Base
  default from: 'your email address'
  layout 'mailer'
end
- Save this file
Step-3
- Open rails application in the editor (sublime), if you have setup the app please follow the previous tutorial.
- Then go to our environment folder then development.rb file because we are on the local system thats why we configure only in the developement file, when we will going live then production.rb will be changed till then do not change anything in this file
- Next is copy the previous code under the Rails.application.configure do
  # Email
  config.action_mailer.delivery_method = :smtp
  config.action_mailer.perform_deliveries = true
  config.action_mailer.default_url_options = {host: 'localhost', port:3000}
  config.action_mailer.smtp_settings = {
    address: 'smtp.gmail.com',
    port: '587',
    enable_starttls_auto: true,
    user_name: ‘your gmail address here,
    password: ‘your gmail password here,
    authentication: :plain,
    domain: ‘domain’
  }
Domain: The domain address could be anything, its your company domain or nay personal domain, if you haven’t any then remove this line.
Step-4
- Now change the devise mailer sender address with the below code at the devise.rb file:
config.mailer_sender = ‘[email protected]'
- Now save this configuration and start your server
rails s
- Now our app is ready to send the email to the users
- The default mailing address will be your email address
- Now go the below url
http://localhost:3000//users/password/new
-
Entered your registered email and submit the form, as shown below
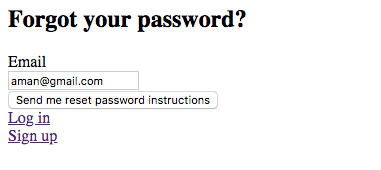
-
Now the email will be send. You can check the logs in the terminal whether email is sent or not. Or you can also check your sent mails
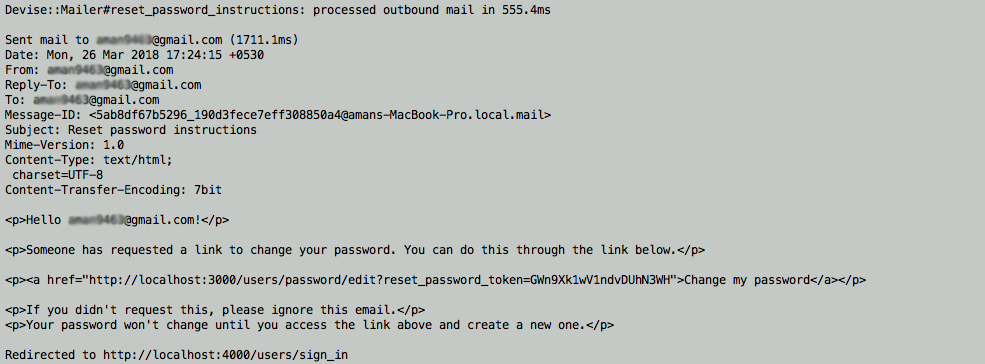
Curriculum
Posted on Utopian.io - Rewarding Open Source Contributors
Replies (8)
Thank you for the contribution. It has been approved.
You can contact us on Discord.
[utopian-moderator]
Hey @amn I am @utopian-io. I have just upvoted you!
Achievements
Community-Driven Witness!
I am the first and only Steem Community-Driven Witness. Participate on Discord. Lets GROW TOGETHER!
Up-vote this comment to grow my power and help Open Source contributions like this one. Want to chat? Join me on Discord https://discord.gg/Pc8HG9x
great... you are make you way on utopian very well sir.
Thanks
Sure sir, I will be improving my tutorial contents and try to give more details so that user will easily understand
Hey @rdvn, I just gave you a tip for your hard work on moderation. Upvote this comment to support the utopian moderators and increase your future rewards!
Congratulations! This post has been upvoted from the communal account, @minnowsupport, by amn from the Minnow Support Project. It's a witness project run by aggroed, ausbitbank, teamsteem, theprophet0, someguy123, neoxian, followbtcnews, and netuoso. The goal is to help Steemit grow by supporting Minnows. Please find us at the Peace, Abundance, and Liberty Network (PALnet) Discord Channel. It's a completely public and open space to all members of the Steemit community who voluntarily choose to be there.
If you would like to delegate to the Minnow Support Project you can do so by clicking on the following links: 50SP, 100SP, 250SP, 500SP, 1000SP, 5000SP.
Be sure to leave at least 50SP undelegated on your account.
Using irrelevant tags, especially popular tags, makes it hard to find good and relevant content.
Please try to use only relevant tags when posting.
#steemstem
Please be mindful of topic-specific tags. These tags are for articles written in these topics.
The Guide To Using Tags: The Game of Tags.
More Info: Abuse Guide - 2017.