
.jpeg)
Community post
💙🔹Stunning 3D Text Effect in PhotoShop🔹💙

Hy Steemians! Today, I'm here with Stunning 3D Text Effect...
In this Post, I want to explain fascinating Idea about 3D effect...
How can we create this effect in Adobe PhotoShop?
so, Let's Started..
Suggestion
You should save your work to handle the case of file corrupt or any loss of your work.
Let Start it in Adobe Photoshop
Firstly, Open the Adobe Photoshop.

Go up to the menu File: New option in dropdown menu and click. Appear Popup screen, Create a new blank page and set the Width and height, Background Contents: white and also select the Advanced: color profile and then press button OK.
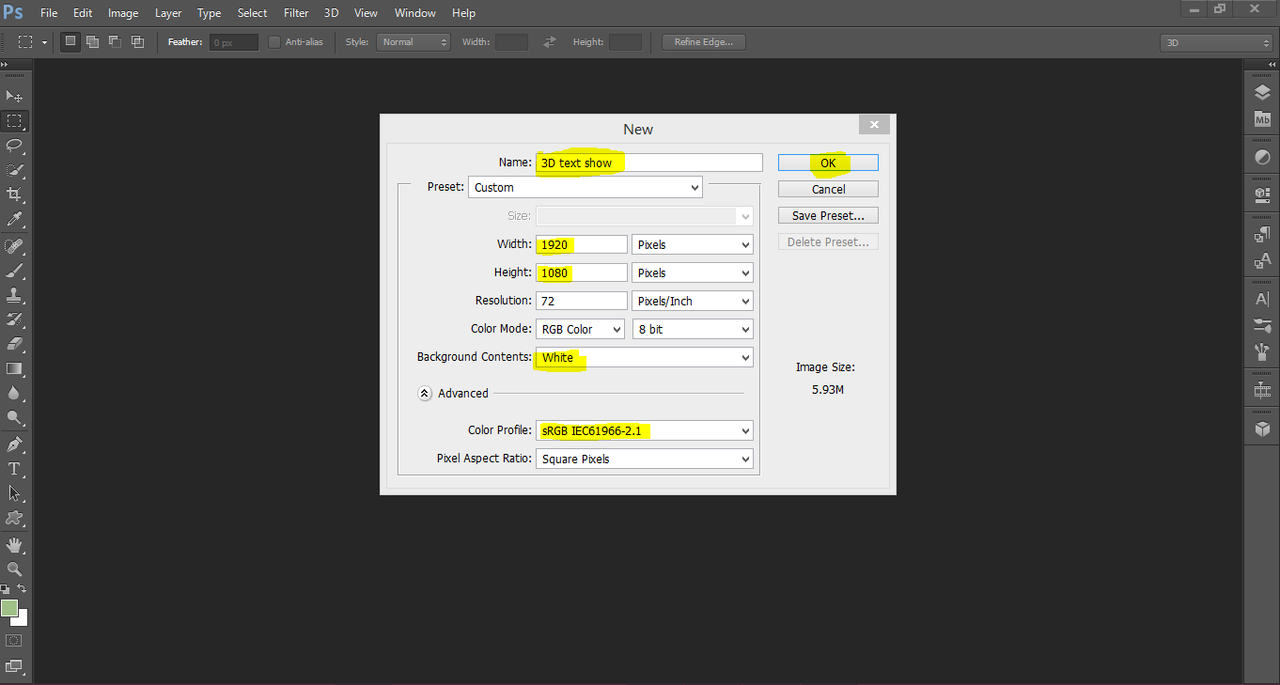
Instantly, New Page will Show

Select the Type Tool in Toolsbox
Select the Horizontal Type Tool and click. Then, Choose the Font as your choice... Type the text and then press the checkbox ✔ in the Options Bar at the top of the screen.
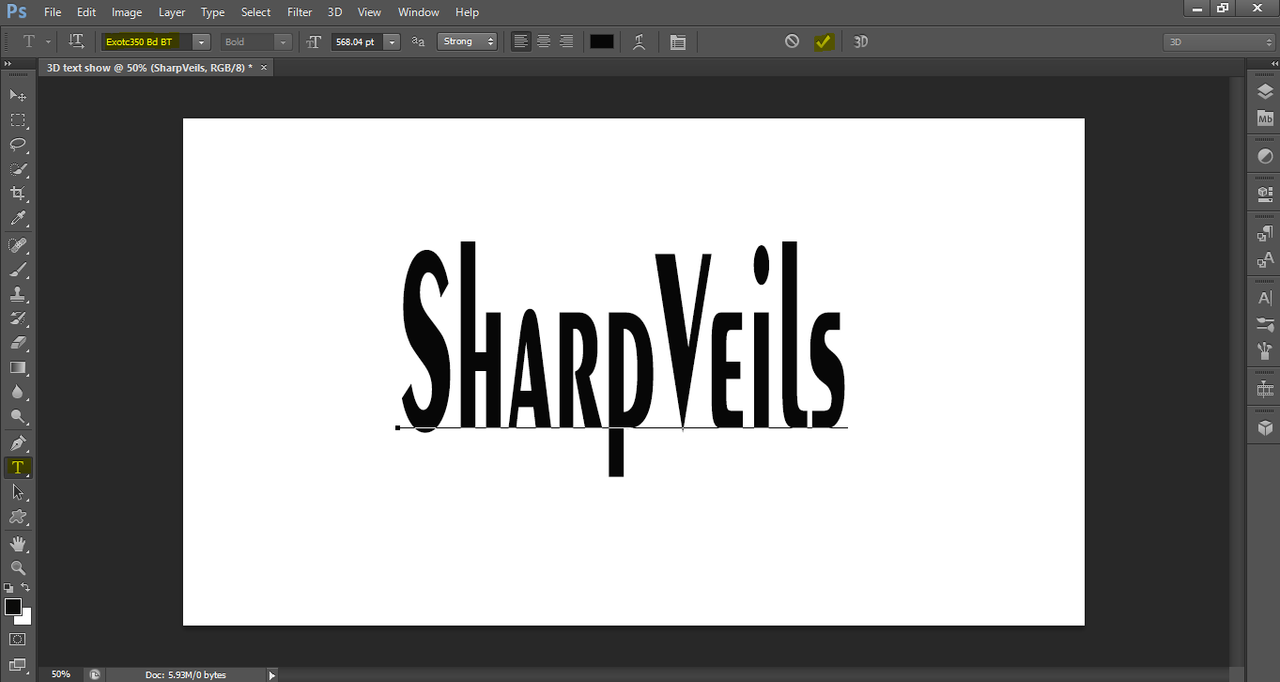
Right click in copy layer and select the Rasterize Type.

Select the Brush Tool in Toolsbox
Select the Brush tool and choose the Font Size as you choice would you like and also select the Hard round Brush.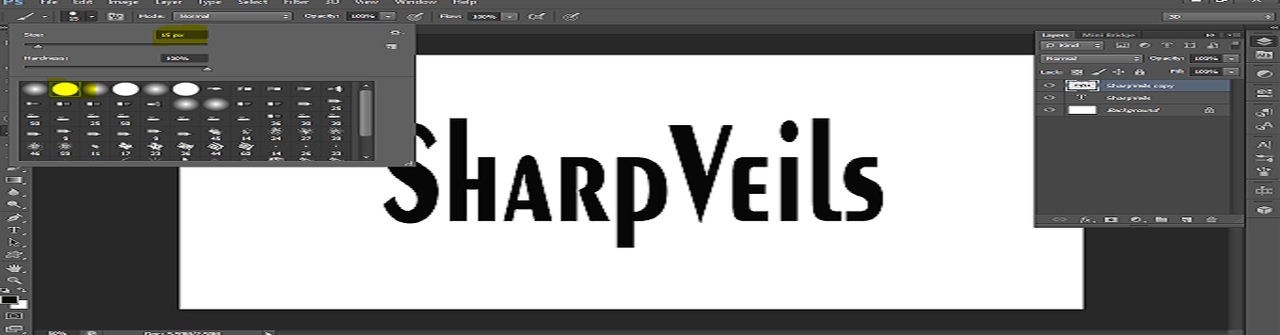
Hold Shift Button and draw a lines by using Brush Tool.
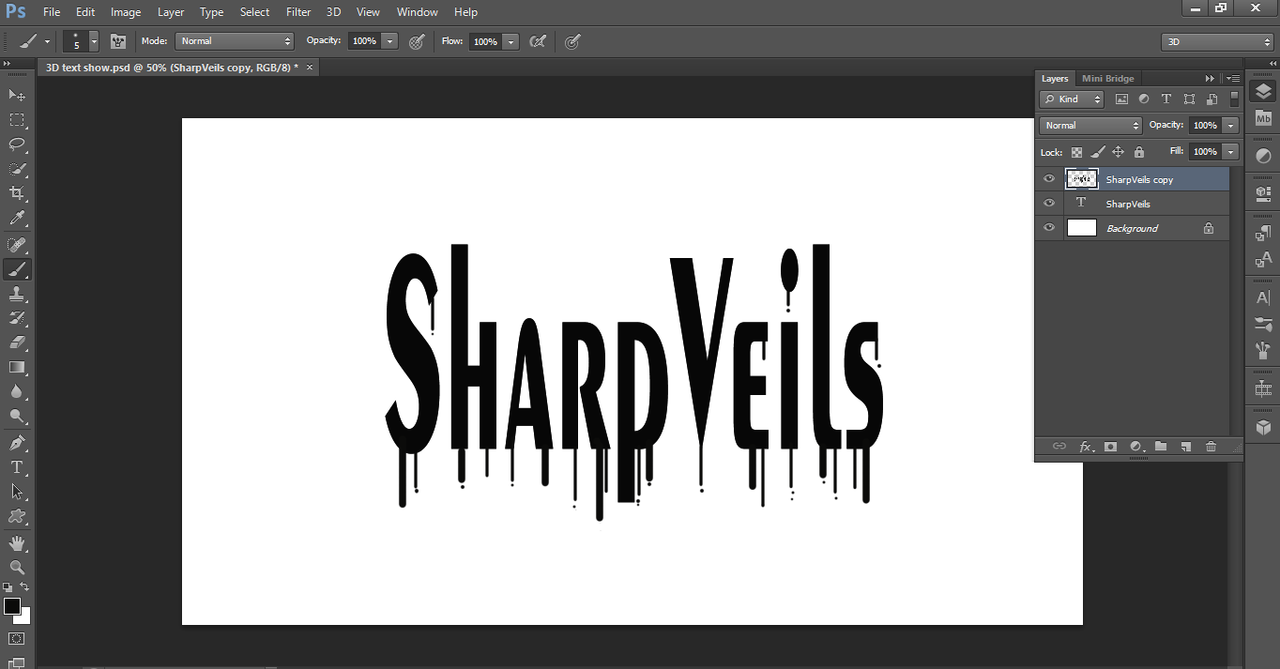
Hold the Ctrl Button and keep holding it & Click on Text. Select the layer the whole Text will be selected.

Select the Gradient Tool in Toolsbox
Select the Gradient Tool and click. Then, Choose the Linear Gradient. and Draw Arc.

De Select the selection by pressing Ctrl+D. Main layer will be Deleted.

Right-click in New 3D Extrusion From Selected Layer.


Select the layer Copy extrusion.

Open the Properties :- Diffuse:Color. Select the color on your choice.

Select the Background layer and press right click Postcard.


Merge Both layers by pressing Ctrl+E.

Go up to the menu 3D: Render in dropdown menu and click.
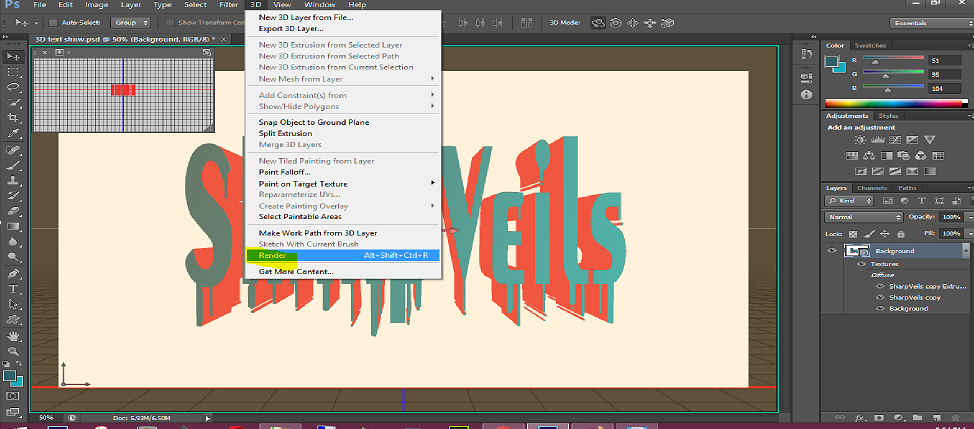
Rendering takes much time.


Right click on **Rasterize 3D** Layer.

Create New Layer and Select the Magic Wand Tool on the Toolbox. Hold Shift Button and select the text by magic wand tool. Copy the Selected part and paste in the layer.

Add the Hue/Saturation Layer
Select the Hue/Saturation New Adjustment Layer from the list that appears.


Open an image and if you want to paste it.
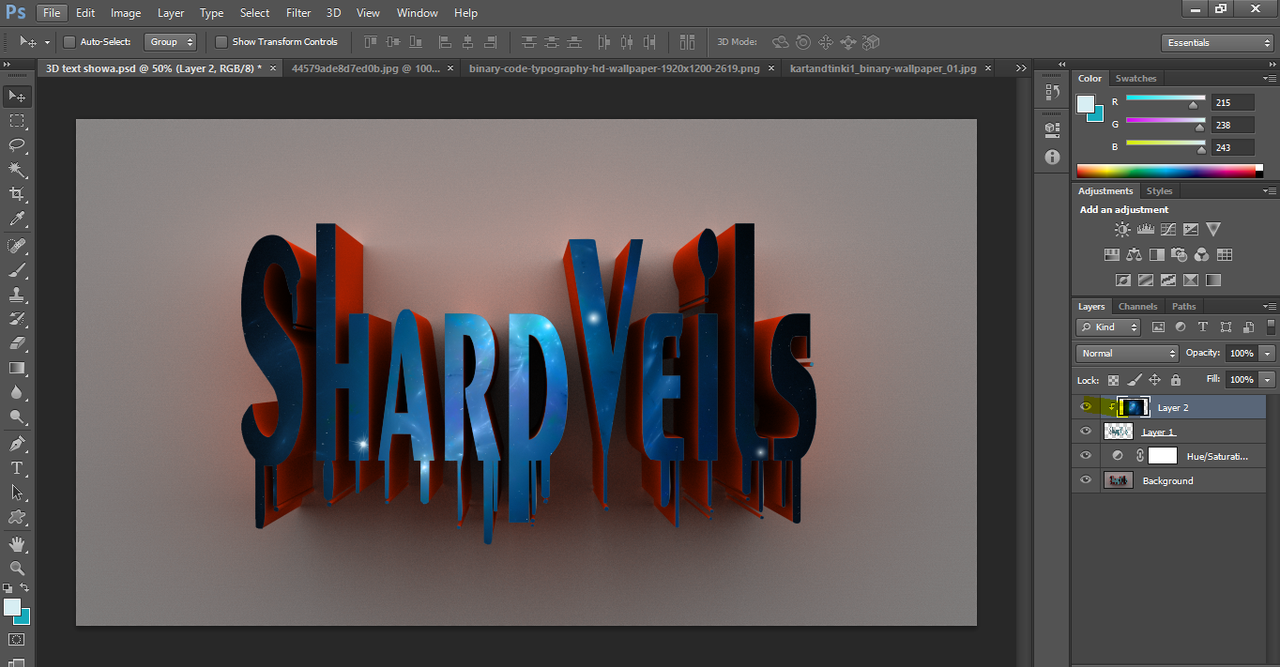
Hold left click on the image and Drag it on your project. Hold Alt Button and click between image layer and text layer.
Replies (4)
Congratulations! This post has been upvoted from the communal account, @minnowsupport, by sharpveils from the Minnow Support Project. It's a witness project run by aggroed, ausbitbank, teamsteem, theprophet0, someguy123, neoxian, followbtcnews, and netuoso. The goal is to help Steemit grow by supporting Minnows. Please find us at the Peace, Abundance, and Liberty Network (PALnet) Discord Channel. It's a completely public and open space to all members of the Steemit community who voluntarily choose to be there.
If you would like to delegate to the Minnow Support Project you can do so by clicking on the following links: 50SP, 100SP, 250SP, 500SP, 1000SP, 5000SP.
Be sure to leave at least 50SP undelegated on your account.
I have photoshop in my pc, but never use it. This is really a nice work.
Thanks 💙 @hananan
Hello sharp-veils,
@SteemEngineTeam would like to take the time to thank you for signing up and participating in our community. Your contributions and support are important to us and we hope you will continue to use our platform.
We plan to give back to our community members, so have an upvote on us!
Thank you.